Photography in Iceland – the complete guide
Iceland is a photographer’s paradise! This magnificent country is a compendium of breathtaking landscapes, soft northern lights, ice and volcanoes, little peat houses, rivers and waterfalls. In other words, everything you need to make a photographer happy.
Photography in Iceland is the dream of many photographers who, every year, travel to Iceland in winter or summer to discover the country’s natural sites. As Samy is a nature photographer (wildlife and landscape), and we’ve spent a lot of time in Iceland, we’ve decided to put together a complete guide to photography in Iceland.

The particularities of landscape photography
Landscape photography is a field where you have to see the big picture. This is especially true in Iceland, where the landscape is so vast.
Landscape photography requires a lot of moving around, sometimes over hundreds of metres, to find the right angle, the right distance and the right composition. The first qualities of a landscape photographer are therefore patience and perseverance.
To get unique shots, you need unique moments! And these moments have to be earned.
The other particularity of landscape photography is the difficulty of managing contrasts, for example between the sky and the ground. It’s true that some cameras have better dynamic range, and therefore manage contrasts better, but it’s above all the management of light that makes it possible to obtain balanced shots. Choosing the right moment, the right exposure and the right frame is essential for this.
Finally, landscape photography is almost exclusively done with wide-angle lenses. But in certain situations, longer focal lengths can be used. This is the case, for example, if you want to photograph a mountain that is too far away. So don’t be afraid to break the rules. Generally speaking, in photography, the people who get unique shots are those who don’t set themselves any technical or artistic barriers.
Photography in Iceland
For photography in Iceland, you need almost the same equipment as for trekking. You need to be prepared for any kind of weather. To do that, you need the right clothes and the right equipment. In Iceland, there’s a saying that there’s no bad weather, only bad clothes. In other words, if you’re well equipped, you can stay out and enjoy Iceland whatever the weather.
For photography in Iceland, the ideal is to rely on the onion skin rule for your clothing. There’s nothing simpler than wearing several layers of rather thin Merino wool, for example. Here’s an example of clothing for Iceland in winter:
- A thermal under-layer with silk or fleece leggings, merino wool socks and a merino wool jumper.
- A middle layer of thick fleece and waterproof ski trousers.
- A final layer with a waterproof winter jacket, waterproof gloves, a woollen neckwarmer and a woollen hat.
Having the right clothes means you can stay outside longer, which is necessary for photography in Iceland.
In winter, it’s also essential to be able to stay outside to wait for and photograph the Northern Lights.
Finally, to make sure you can stay warm in all circumstances, I’d advise you to pack enough clothes to change several times. It’s always better to pack more clothes than you need in Iceland.

Equipment for photography in Iceland
Iceland is a special country, including when it comes to the photographic equipment you need. While the basics are the same in all countries, additional equipment is needed in Iceland, to cope with the climate and its hazards. Here is our list of photo equipment for Iceland:
- Camera: Your camera body, of course. Full format cameras are the best, but you can take photos in Iceland with any camera.
- Wide-angle lens: For landscape photography, we’ll mainly need a wide-angle lens, ideally between 18 mm and 24 mm.
- Standard lens: A 50 mm lens is sometimes useful, for photographing a mountain in the distance, for example, or for portrait photography.
- Telephoto lens: People who want to take wildlife photos in Iceland will need a telephoto lens, ideally a 600mm (the Tamron 150-600mm for example).
- Photo tripod: A tripod strong enough to withstand the Icelandic wind and the weight of any telephoto lens.
- Rain cover: Protecting your equipment is essential. If you want to take photos in Iceland whatever the weather, you’ll need a rain cover.
- Absorbent fabric (microfibre type): The Icelandic climate is notoriously wet, and that’s no myth. So you’ll need to bring something to wipe down your lenses and camera regularly.
- Chamois leather: After wiping a lens with an absorbent cloth, it is necessary to use a chamois leather.

Photography in Iceland: The best landscapes to photograph
I don’t even dare talk about the best and the worst, because photography in Iceland is such a pleasure wherever you are. You’ll find subjects to photograph everywhere, shapes and textures to exploit. What’s more, the gentle northern light enhances any landscape, building, animal, etc.
I’ve listed the best photography spots in Iceland here, but I strongly encourage you to get off the beaten track and wander off into isolated corners to find your own little paradise away from the tourist masses.
Photographing the glacier Vatnajokull
Vatnajökull is the second largest glacier in Europe. This giant of ice in south-east Iceland offers a wide range of landscapes for photographers.
First and foremost, you need a guide and mountaineering equipment to climb the Vatnajökull glacier. The glacier is dangerous and not to be taken lightly. For those who want to try their hand at adventure, there are a number of companies offering treks on the glacier. For the rest of us, here are a few tips for photographing the Vatnajökull glacier on your own.
Glaciers are synonymous with glacier tongues. And Vatnajökull has several of them. These glacial tongues are sometimes accessible by car, such as Fjallsárlón, where there is also a lagoon formed by the melting ice.
There is also a hiking trail to the west of the Skaftafellsjökull glacier tongue. This path runs alongside the glacier and offers some interesting viewpoints for landscape photography.
Access to the glacier tongues is the best way to photograph the Vatnajökull glacier. Especially as in some cases, such as Jökulsárlón or Fjallsárlón, thousands of icebergs and blocks of ice fall into a lagoon offering endless possibilities for landscape photography.
From a technical point of view, to photograph a glacier, you need to pay particular attention to exposure. It’s essential to set the camera to manual mode to ensure correct exposure, as cameras are often affected by the surface reflections caused by the ice.
Finally, you need to be patient and wait for the right light for the desired result. Direct sunlight will tend to reveal the deep blue of the ice, whereas an overcast sky will produce a grey/white effect.

Photograph Diamond Beach and Jökulsárlón
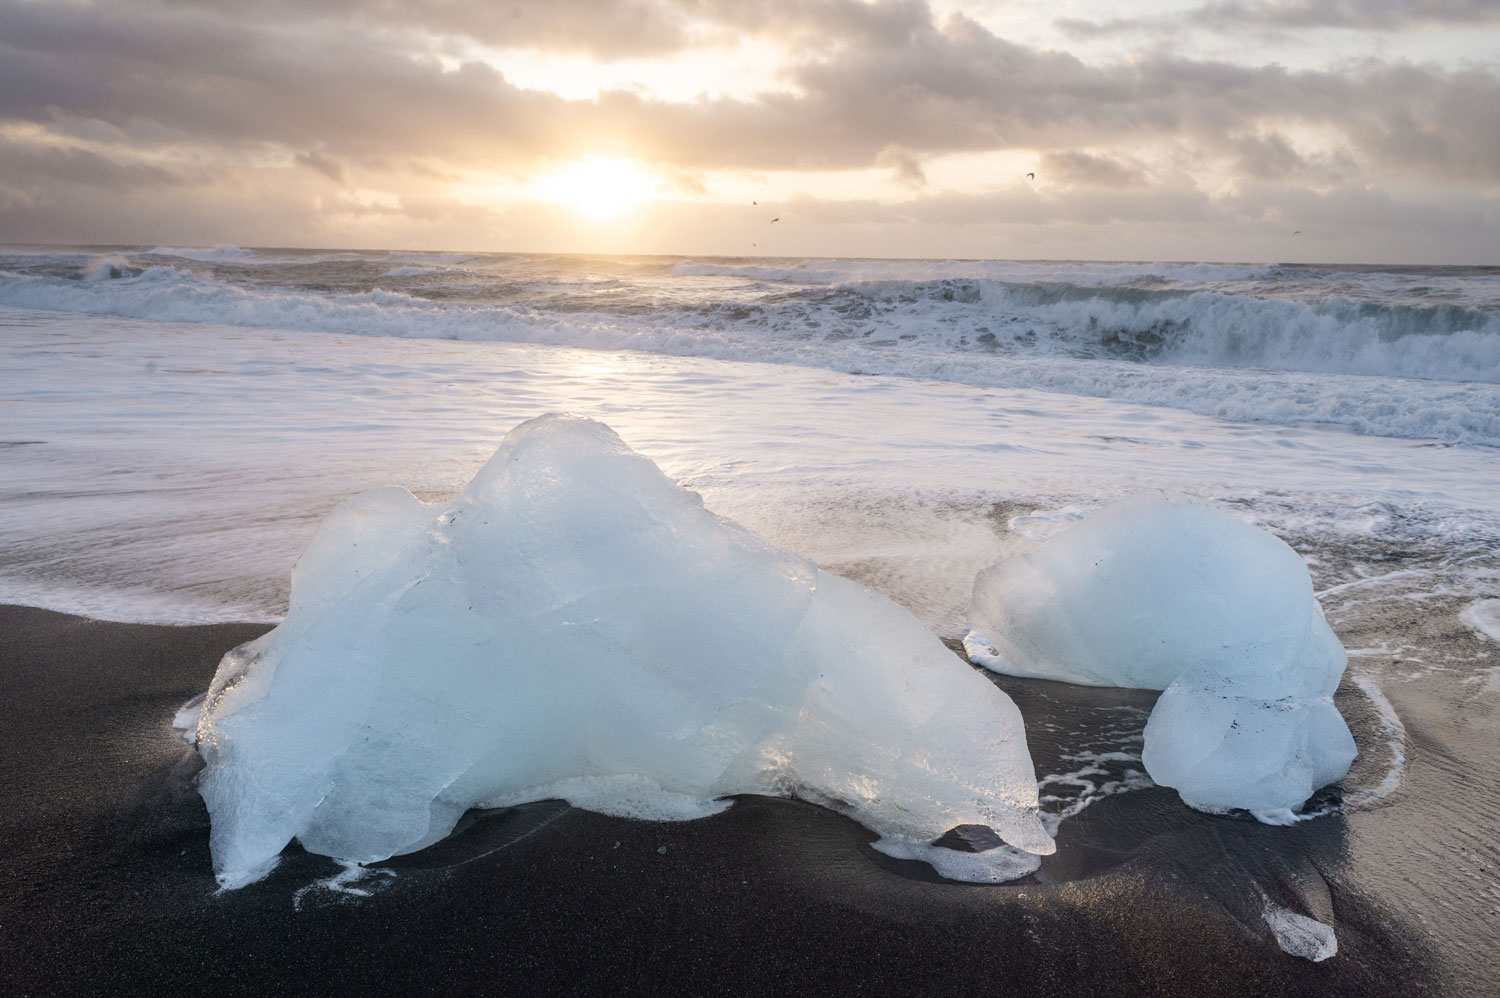
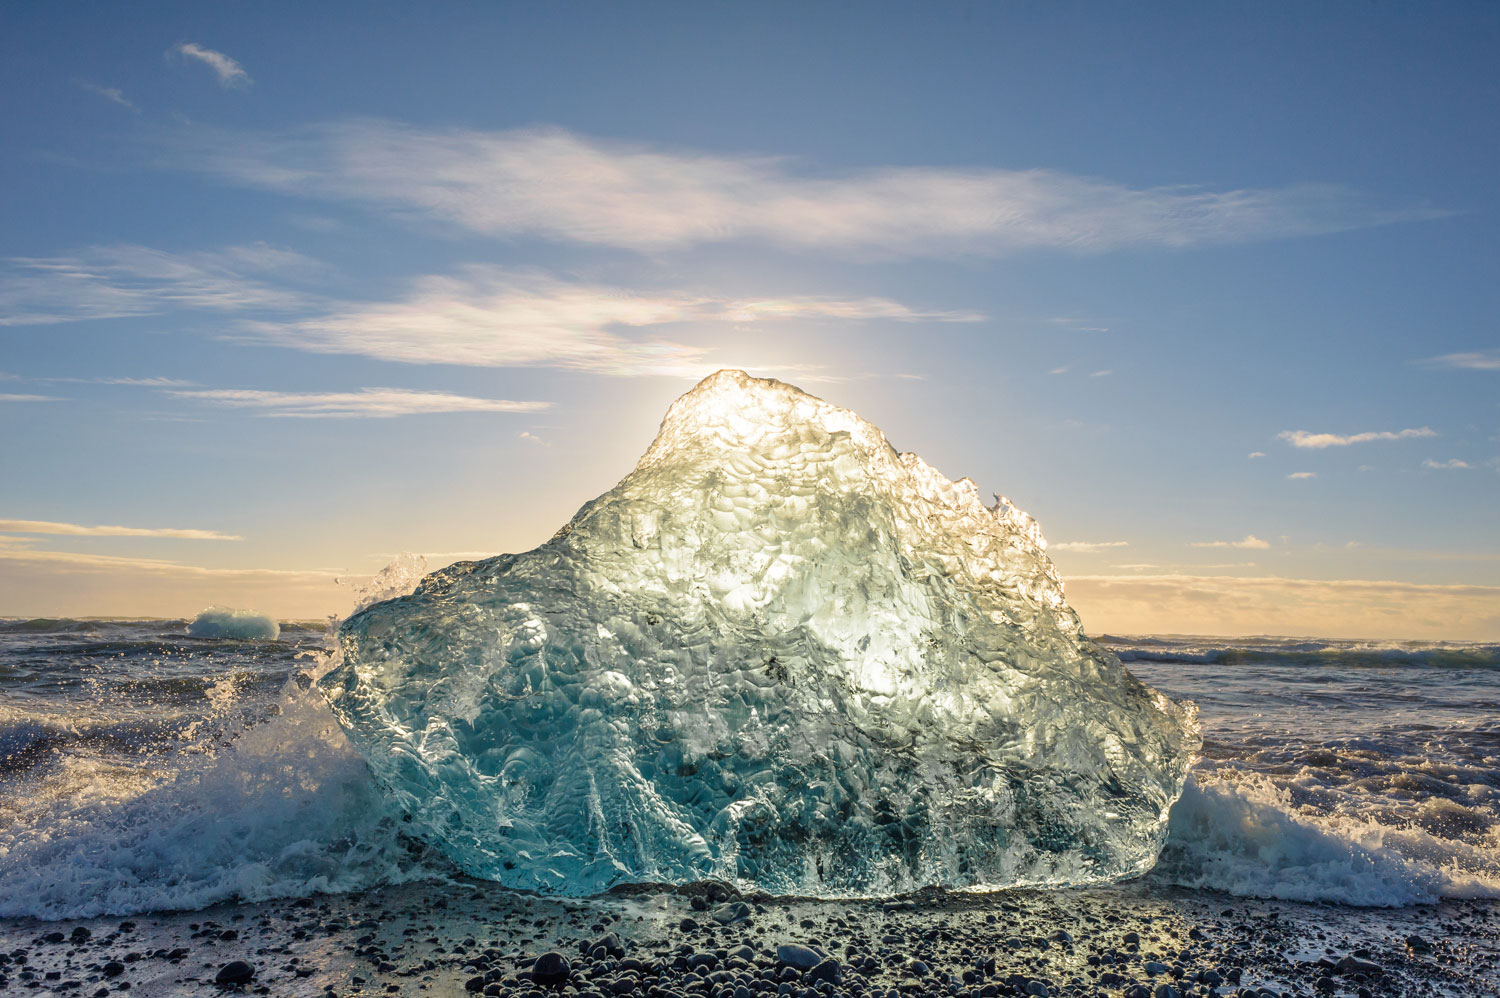
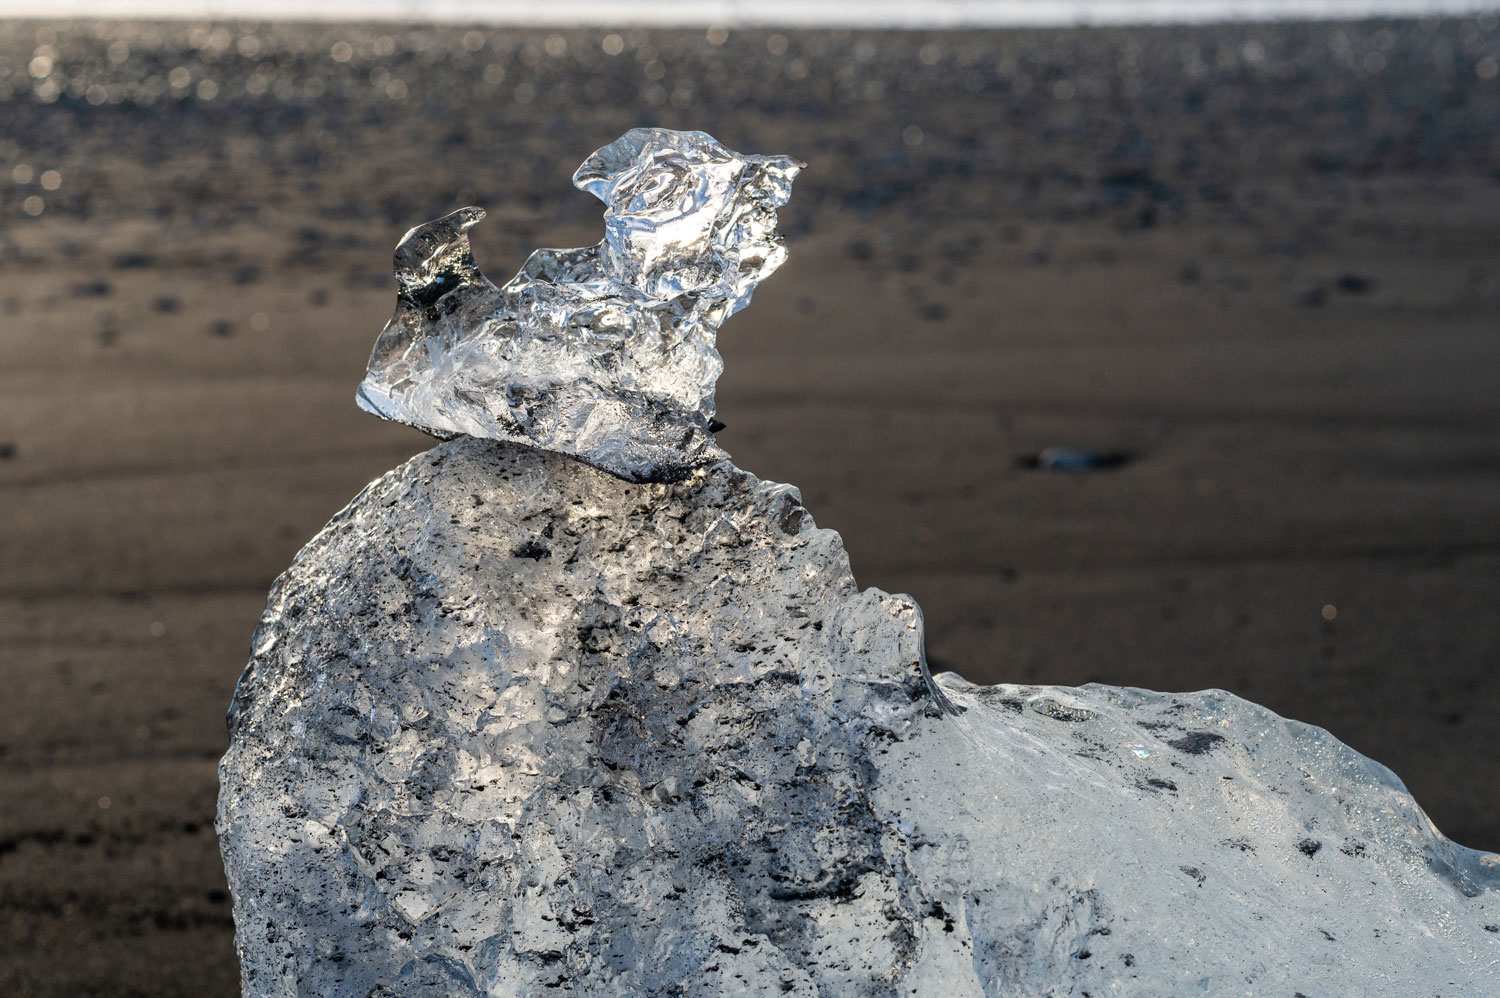
One of the most photogenic sites in Iceland is Diamond Beach, near Jökulsárlón. This beach is unique in that thousands of icebergs and blocks of ice wash up on the black sand. A unique sight that attracts a large number of photographers to Iceland every year.
We spent a lot of time photographing at Diamond beach, and if we could give you one piece of advice, it would be to get up early! This black sand beach is perfectly exposed for sunrise photography. The first light of day breaks through the ice, creating an incredible play of light and colour. It’s even possible to have the sun in the frame.
You should also allow time to photograph Diamond Beach. The beach stretches for several kilometres on either side, so the possibilities are endless. It’s best to get a little distance from the car park and the river that leads to the ocean, so you can be alone and avoid having people in the frame.
Photography on Diamond Beach is ideal for photographers who like to work with shapes and colours. Those who like the abstract will find a superb playground with the warm colours of the sun, the black of the sand and the blue and white of the ice. The ocean waves are an added bonus, as they allow you to compose with two elements that are the same, but in different forms: ice, frozen, and water in motion. In fact, at night, Diamond Beach is perfect for long exposures of blocks of ice in the water – the effect is quite striking.
The black sand beach of Vík
The black sand beach at Vik is perhaps Iceland’s main tourist attraction, as images of it have circulated on millions of Instagram accounts, blogs, magazines and even in series such as Vikings and the Icelandic TV show Katla. So it’s impossible to do any photography in Iceland without passing the black sand beach!
As well as its black sand, Vik beach is a melting pot of natural curiosities. First of all, you can see three rocky peaks that are reputed to be three trolls frozen by the sun. Then, at the entrance to the beach, a cave surrounded by basalt columns is quite simply one of the most beautiful natural sites in the world. Finally, on the other side of the beach, Dyrhólaey offers a breathtaking view of an arch sculpted by the ocean waves that crash against it. This vantage point offers landscape photographers one of the best opportunities to capture the fury of the elements.
The best time for landscape photography in Vik is early in the morning. The sun rises behind the three trolls, creating incredible lighting effects with the basalt columns, the reflections of the waves and the water gliding over the black sand. By taking photos in Vik at sunrise, you can also avoid the tourist crowds.
But be careful with your camera equipment. The sand on Vik beach is very thin. When the wind picks up, this sand can damage lenses. Even a camera bag is not impermeable enough to protect your equipment. It is therefore advisable to carry a bin liner in case of emergency.

Taking photos at Goðafoss
Of the thousands of waterfalls and cascades in Iceland, Goðafoss is one of the most beautiful and culturally significant. In fact, this waterfall is where the Icelanders symbolically threw down their pagan gods when they converted to Christianity. Indeed, that’s where its name comes from. Godafoss means “the waterfall of the gods”!
Photographing Godafoss is a pleasure, as this natural site offers so many different possibilities. The waterfall is shaped like a circus, and can be accessed from a number of different points for different views.
In winter, Goðafoss partially freezes. This offers a magnificent spectacle of powerful torrents contrasting with parts frozen by the cold. Early in the morning or at the end of the day, you can take long exposures to create motion blur effects and highlight this contrast.
With a telephoto lens, you can also capture the details of the ice formations and stalactites.
In summer, Godafoss is bursting with colour. The flora around the waterfall is rich, so you can use plants or a lichen-covered rock as a foreground.
During the tourist season, however, there are bound to be more people around, which complicates things. If you want to take photos at Godafoss without having dozens of people in your frame, we advise you to go at dawn or dusk. There are usually only two or three photographers on site at sunrise.

Photography in Iceland: the Golden Circle
One of the must-sees when visiting Iceland is the famous Golden Circle. This route includes the three natural sites of Geysir, Gullfoss and Thingvellir.
The main attraction of the Golden Circle is its proximity to the capital Reykjavik. The three natural sites of the Golden Circle are about an hour’s drive away.
Unfortunately, given the high number of visitors to the Golden Circle, it is becoming increasingly difficult to take photographs there. Sometimes busloads of tourists arrive every few minutes. So it’s best to be patient and choose the right time: early in the morning, before first light, and at the end of the day.
Geysir is the best-known site in the Golden Circle. This gushing hot spring is a sight to behold. But to photograph it, you have to be prepared to spend some time there. The water gushes out of the spring every 5 minutes or so. So you need to be on the lookout for the slightest sign, usually a few bubbles, that the water is about to burst.
As for the settings, the exposure time should be short enough to freeze the water gushing out of the geyser.
Gullfoss waterfall is spectacular for its width and flow. When the sun comes out, a rainbow can be seen at the foot of the waterfall. These are the best times to photograph.
The best time to photograph Gullfoss is during golden hour, an hour before sunset. This time of day produces warm photos with golden highlights.
Finally, Thingvellir National Park is the last spot in the Golden Circle. There are several places in the park that are ideal for photography. These include the Öxarárfoss waterfall, Þingvallakirkja or Thingvellir church, and Iceland’s largest lake, Þingvallavatn.

Photographing the Northern Lights in Iceland
If there’s a unique experience to be had, it’s seeing and photographing the Northern Lights in Iceland.
The Northern Lights are a manifestation of volcanic activity on the surface of the sun. While the sun sends its rays down on us during the day, at night it sends back particles that, when they come into contact with our atmosphere, turn colours ranging from green to red to purple. Seeing the Northern Lights is a photographer’s dream, and there are a few things you need to know about photographing them in Iceland.
Firstly, as the Northern Lights are only visible at night, and it’s very cold in Iceland, you need the right clothes to be able to stay outside for several hours. See the section on equipment for that.
Next, you need to keep a close eye on the weather and aurora borealis forecast. In Iceland, it’s best to use the Vedur website. This Icelandic website offers the country’s most accurate weather forecasts, as well as aurora borealis forecasts linked to cloud cover. Vedur is therefore perfect for finding out where to go to photograph the Northern Lights in Iceland.
Setting up your camera to photograph the Northern Lights
From a technical point of view, you need to master long exposure to photograph the Northern Lights. Ideally, you should prospect during the day to find the right landscape and frame. Having a good foreground and background is the basis for successful Northern Lights photography. Once you’ve found the spot, you need to come back at night, set up and make your adjustments before the show begins. To freeze the movement of the Northern Lights as much as possible, you need to open your lens as wide as possible (to increase the amount of light entering), and increase the ISO, ideally between ISO 4000 and ISO 6400.
The final step is to adjust the exposure so that you have the Northern Lights, the foreground (a lake, for example) and the background (the mountains, for example) in your image.
Finally, patience is essential when photographing the Northern Lights in Iceland. Nature is unpredictable, clouds come and go, and the aurora can appear at 9pm, midnight or 4am. But more often than not, the 11pm to midnight time slot is the most likely to see the Northern Lights.

Wildlife photography in Iceland
Wildlife photography in Iceland doesn’t usually come to mind. Yet this island lost on the edge of the North Atlantic is teeming with life. Thousands of seabirds, cetaceans and emblematic animals such as the arctic fox and the ptarmigan – Iceland is a paradise for anyone wanting to observe Arctic wildlife.
Photographing Arctic foxes in Iceland
While it’s possible to see and photograph Arctic foxes just about everywhere in Iceland, Hornstrandir nature reserve in the Westfjords is known for its high density of Arctic foxes. It is undoubtedly the best spot in Iceland for wildlife photography. However, the reserve is very isolated and can only be reached by ferry. So you’ll need to plan to sleep in a tent if you want to see the Arctic fox. Ideally, you should trek there for several days to increase your chances of seeing the foxes and to vary the scenery. We have dedicated an article to self-sufficient trekking equipment, which is ideal for this reserve.
There are two types of Arctic fox in Iceland, the brown (or blue) Arctic fox and the white Arctic fox. Both are present in Hornstrandir reserve, but brown foxes are in the majority.
You’ll need a 400mm telephoto lens minimum to photograph the Arctic fox while keeping your distance and limiting disturbance.
Photographing Arctic foxes in Iceland is a wonderful experience. To see them hunting seabirds on the cliffs, walking along the black sandy beaches in search of food or raising their young in this extreme climate is a privilege.
For photographers with little or no experience of extreme environments, a number of Wildlife tours are available in Iceland. For example, Wildlife Photo Travel offers an Arctic fox photo tour in Hornstrandir.
Departures for the Hornstrandir nature reserve are from Isafjordur, the main town in Westfjords. There are other interesting photo spots in the area, such as the Dynjandi waterfall, about an hour south of Isafjordur.

Photographing puffins in Iceland
Puffins are the photographers’ stars! It’s impossible to do wildlife photography in Iceland without seeing puffins nesting on the cliffs.
Puffins can be seen just about everywhere in Iceland. The region of Vik is one of the closest to Reykjavik where you can see and photograph puffins. Several islands, such as Grimsey in the north and Vigur in the Westfjords, are also known to be home to a large population of puffins.
In the Westfjords, the cliffs of Látrabjarg are a paradise for birdwatchers and wildlife photographers. As well as puffins, it’s easy to spot razorbills, guillemots, black guillemots, black-legged kittiwakes, northern fulmars and parasitic jaegers. There are even populations of Arctic fox and rock ptarmigan living nearby.
Photographing puffins in Iceland is not very complicated. These small seabirds are calm and peaceful, and not at all shy. It is possible to observe them from a distance of a few metres, but it is still advisable to use a telephoto lens of at least 200 mm, ideally 400 mm, so as not to be tempted to get too close. The aim is always to limit disturbance by remaining discreet, silent and keeping a reasonable distance.

Photographing Icelandic horses
Photographing Icelandic horses is an incredible experience for anyone who loves animals and horses in particular.
First of all, horses in Iceland are not wild animals, even if they sometimes look like it. In other words, they all have an owner.
The Icelandic horse is a breed of horse descended from the first horses imported to Iceland by the Vikings. They originated in Norway, but were later mixed with Irish and Scottish horses. The breed has been protected in Iceland for 1,000 years and it is forbidden to import horses to the island.
Photographing Icelandic horses is very interesting for several reasons. Firstly, they are at home in all kinds of terrain, including the most beautiful landscapes of Iceland. To see them galloping through the mountains and facing up to the extreme elements is quite impressive. Secondly, they are fairly easy to find. There’s no need to prospect for days on end to finally get a shot. Finally, they’re the ideal animal to include in compositions such as photos in a blizzard or under the northern lights. Being calm animals, anything is possible with them.
In our opinion, it’s impossible to do photography in Iceland without spending some time with Icelandic horses. Along with sheep and Arctic foxes, they are the soul of Iceland!

Photographing wild reindeer in the East Fjords
Here’s an animal you’d never suspect in Iceland! When we think of reindeer, we tend to think of Scandinavia, Canada or Greenland. But did you know that there are wild reindeer in Iceland? These animals live mainly in the east fjords, where they have managed to adapt over the last two centuries. Their ancestors were imported from Norway to be bred in Iceland. But the attempt failed and the Icelanders abandoned the reindeer to their fate. Surprisingly, the reindeer managed to survive and a population of around 7,000 now lives in Iceland.
You can see and photograph reindeer in Iceland from the east fjords to the Vatnajökull glacier in the south-east. There’s no magic formula for finding them, just drive east along Route 1 and keep your eyes open. Reindeer are very good at camouflage, so you need to take the time to scan the landscape to see them.
Icelandic reindeer are also easier to find in winter, as they come down from the mountains where food is inaccessible and stay on the coast. It is then possible to photograph them with the mountains in the background, in the snow, in the lava fields or on the coast, with the waves as a background.
Finally, Icelandic reindeer are sometimes very shy and wary, and sometimes used to humans, depending on the individual. The best way to approach them is with a minimum of camouflage, avoiding having the sky behind you so that no human silhouette is visible. It is often possible to use rocks and mounds as a barrier to move forward without being seen.

Photography in Iceland: the final word
You’re now equipped to take photographs in Iceland whatever the weather. If you’re preparing to travel to Iceland in winter or summer, get ready for an incredible adventure! This country leaves no one indifferent, especially photographers. The last piece of advice we can give you is to pack as many memory cards and batteries as you can. After all, Iceland is a photographer’s mecca!